Showing posts with label BWO. Show all posts

Friday, February 21, 2014

Klinkhammer quill body blue wing olive


Materials needed:
Hook:  Curved shank thin wire hook.  I'm using a 206BL, size #16
Thread:  Olive 8/0
Body:  Olive peacock herl with all the fuzz stripped off.
Post:  White closed cell foam.  I'm using 2.5mm foam for my size #16 hook
Thorax:  Peacock herl
Hackle:  Medium dun dry fly hackle, one size larger than your hook.

 Put your hook in your vice.
Start your thread a little behind the hook eye.


Cut a piece of foam about half the width of the hook gap.  Cut the end of the foam on an angle so when you tie it in you don't add too much bulk
Tie in your foam post with 4-6 tight thread wraps.
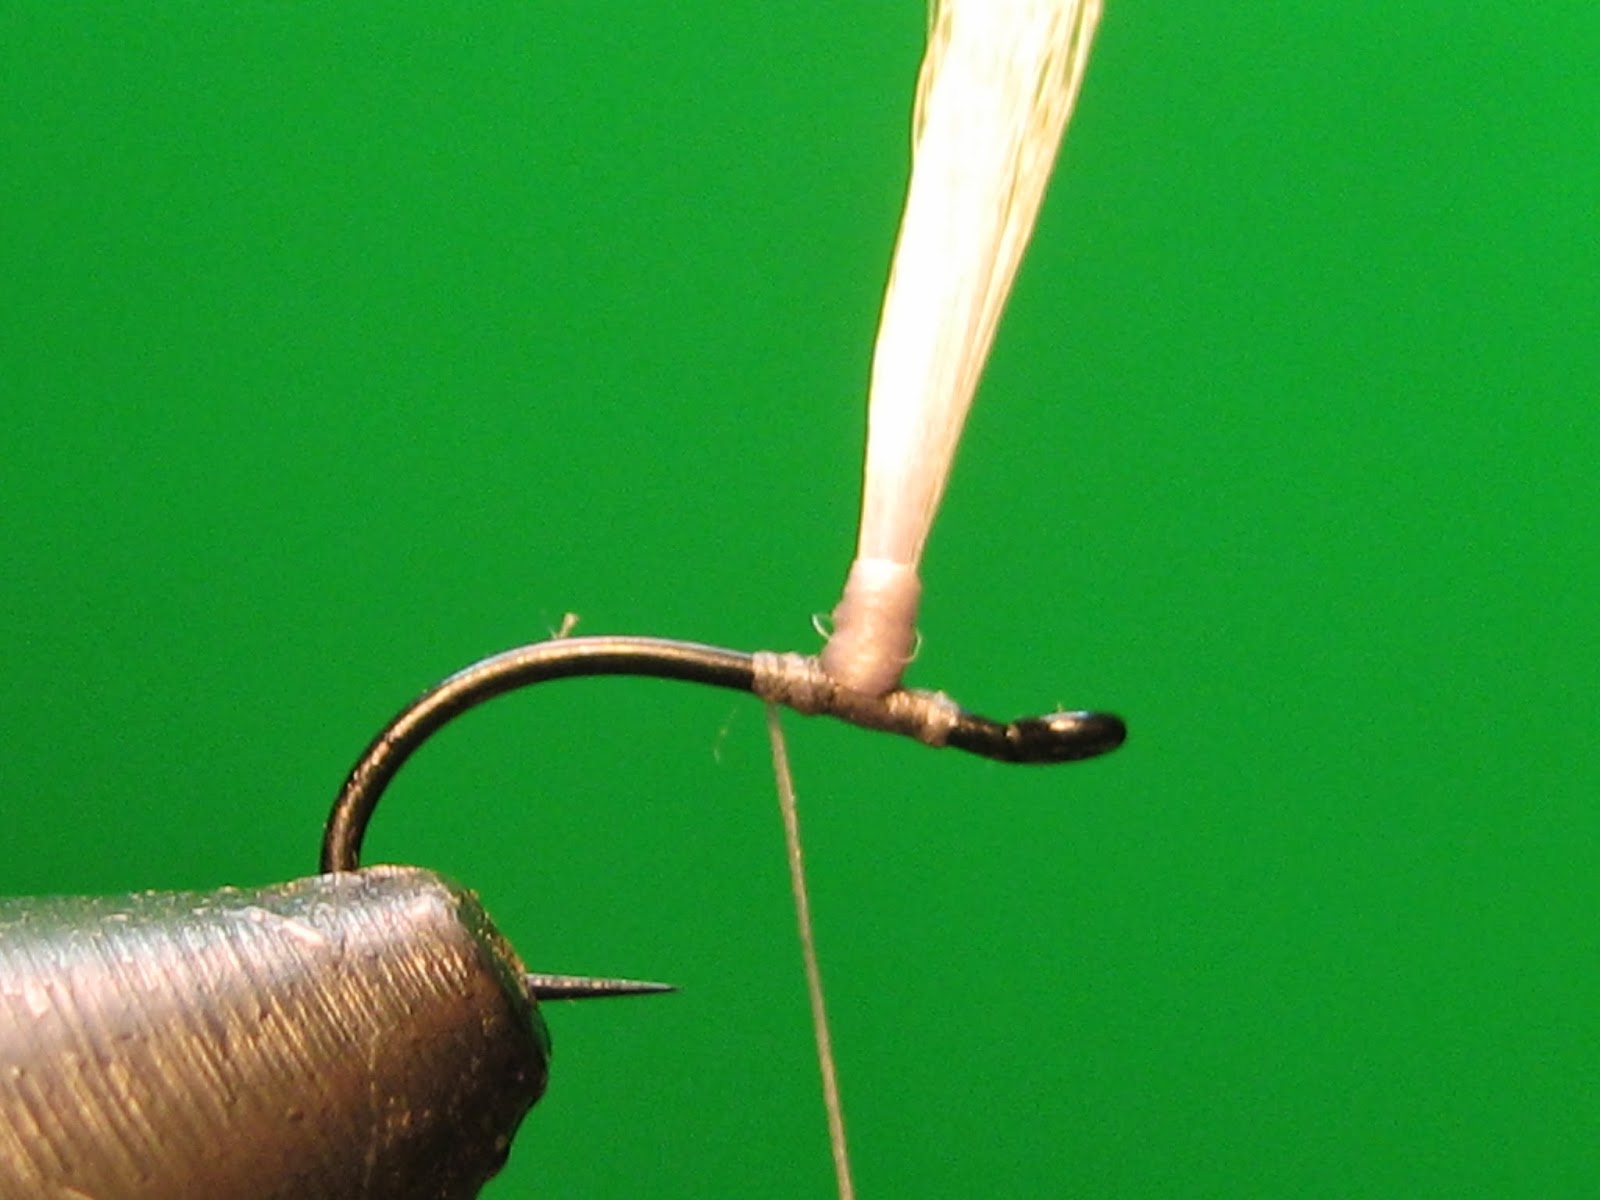
Wrap a few wraps of thread in front of the post to help hold it in place, and wrap as many thread wraps that it takes to cover your tie in point completely with thread.  Make a nice smooth transition from the hook shank up to the foam post.
Wrap 5-6 wraps of thread around just the foam post.


Tie in your hackle parallel with the foam post so it stands up vertically as shown.
Tie in your olive dyed stripped peacock herl to about half-way down the hook gap.
Wrap the stripped peacock herl forward to build the body.
Wrap the herl up to the foam post.
Tie off the herl, and trim the butt end.
Apply some thin U.V. resin to the body to improve durability.
Tie in your natural peacock herl just behind the foam post.
Wrap the peacock herl forward with a few figure 8 wraps, and then tie it off with your thread.
Wrap your hackle around just the foam post 4-6 wraps.  Tie it off by wrapping your thread around the hackle and the post, locking the hackle in place.

Tie your thread off just behind the hook eye, and trim the butt end of your hackle.
Then whip finish, and trim your thread.
Trim the foam post.
You can optionally flip the fly over and put a drop of Zap-A-Gap on the hook eye, and let it seep into the thorax/hackle/post which will make it extra durable.  Just make sure you don't use too much.


If you'd like to see an easy way to strip all the fuzz off the peacock herl see this post:  http://mytroutfly.blogspot.com/2013/07/stripping-peacock-herl-easy-way.html

And here is how I dye the stripped peacock herl:  http://mytroutfly.blogspot.com/2013/07/dyeing-your-own-fly-tying-materials-in.html

Monday, November 4, 2013

Extended body parachute blue wing olive.


Materials needed:
Hook - Thin wire dry fly hook.  I'm using a TMC 206BL size #18
Thread - Gray 8/0 UNI-thread
Parachute wing - I'm using dun colored Hi-Float fibers, but antron yarn, calf tail, etc. can also be used.
Hackle - Medium dun hackle one size larger than your hook.
Body - BWO dubbing with an extended mayfly body shown HERE.

Put your hook in your vise and start your thread.


Tie in some parachute wing material.


Stand up your parachute, and build a post with your thread.


Get your parachute exactly where you want it, and put a drop of head cement on the post to hold it in place.


Tie in your hackle (shiny/convex side facing you) with a few wraps around the feather base, and the hook shank.

I always trim the fibers from the bottom of the feather instead of stripping.  It stops the feather from rotating.


Wrap your thread around the feather, and the post tightly.

This will hold your feather straight up and down as shown.


Tie in your extended body about an eye's length behind the parachute post.


Trim the butt end of the body, and tightly secure your thread over the section you just trimmed.

You can apply Zap-a-Gap to the tie in point if you like, but if you secure it tightly enough, the body shouldn't rotate at all.


Put a little dubbing on your thread, and blend the extended body up to the parachute post.


Put your thread just in front of the parachute post.


Wrap 3-4 wraps of hackle around the parachute post.


Tie off your hackle against the hook shank.


Put some dubbing on your thread, preen back the hackle fibers, and wrap your dubbed thread to build the head of your fly.


Whip finish and trim your thread.

I color my thread with an olive Sharpie marker.


 Trim your parachute wing.


Monday, February 18, 2013

Split wing case BWO nymph


Materials needed:
Hook:  TMC 200R sizes #16-22 Any 2x or 3x long hook shank nymph hook can be used.
Thread:  UNI thread, light olive.
Tail:  Mallard flank feather dyed lemon.
Body:  Fine blue wing olive dubbing.
Rib:  Tippet.  I am using 6x tippet for this size #18 hook.
Wing case:  Black goose biots over olive razor foam.
Thorax:  Fine blue wing olive dubbing.
Legs:  Mallard flank feather dyed lemon.

Place your hook in your vice.


Start your thread.


Trim your thread, and wrap to the start of the hook gap.


Wrap 2-3 wraps of thread to build up a bump to tie your tail in front of.


Tie in your tail, and wrap your thread forward.


Stop wrapping your thread when you reach where your thorax should start, and clip the tag.


Tie in your rib.  Start tying it in where you ended your thread wraps.


Wrap your thread over your rib almost to the tail.

Always leave enough room to wrap one wrap of dubbing behind the start of your rib.


Dub a small amount of BWO dubbing onto your thread.


Build a tapered body with your dubbed thread.


Wrap your rib forward, tie it off, and trim the tag end.


Select 2 black goose biots, and tie them in.


Tie in your your goose biot on the top/side of the hook shank.


Tie in your other goose biot.


Tie in some olive razor foam.


Dub some more BWO dubbing onto your thread.


Build a thorax with your dubbed thread.


Cut a section of mallard flank feather to tie in as legs.

I like to keep the mallard flank feather fibers attached to the stem.  You can tie in both sets of legs at the same time that way.  They are also easier to work with.


Tie in your legs.


Stretch your razor foam over the thorax, and tie it off, and trim the tag.


Pull a goose biot across the thorax, and tie it off.


Pull the other goose biot over the thorax, and clip the tag ends.


Apply head cement directly to the thread, and whip finish.