Saturday, August 24, 2013

Trico spinner


The trico spinner is a very small fly that hatches before the sun comes up usually.  Fish key in on the spinner falls that usually occur just after the sun comes up.  The males have a black body, and they should be fished earlier.  The females have an olive body, and they should be fished later since the females return to the water to drop their eggs.

Materials needed:
Hook:  TMC 101 sizes #22-26.
Thread:  UNI-thread 8/0 black.
Tail:  3 light dun mayfly fibbets, or stiff dry fly hackle fibers
Body:  Thread.  Black for male, olive for female.
Wings:  Antron yarn, cream or white.
Hackle:  Grizzly hackle, trimmed on the bottom.

 Place your hook in your vise.
Start your thread.


Tie in your 3 tail fibers.  The length should equal about 2 times the hook shank.  Keep the tail fibers separated equally.

The tail on trico's are noticeably longer than tails on other mayflies.  


Secure the butt ends to the hook shank.  The butt ends should extend about 2/3 of the hook shank as shown.


Use your thumbnail to push up the tail fibers.


Make sure they are separated as shown.


Tie in a piece of antron yarn on a 45 degree angle with a few tight wraps.


 Pull the piece of antron yarn so it is perpendicular to the hook shank.


When the piece of antron yarn is perpendicular to the hook shank, secure it with a few tight figure-eight wraps.

Trim the wings to length.  About the length of the hook shank.


Tie in a your grizzly hackle.


Wrap 2-3 wraps of hackle, tie it off and then clip the butt end.

Whip finish, trim your thread, and apply head cement.


Trim the hackle from the underside of the fly so it sits flat on the water.


Brook trout fry


There is a lake near me that is absolutely loaded with brook trout fry.  There are also some pretty big browns that feed on those fry.  I basically just changed the colors of this perch fry pattern to match the colors of the brook trout fry as closely as possible.  This style of bait fish pattern is absolutely killer.  It has a very realistic transparent look when it's wet.

Materials needed:
Hook:  Standard 3 or 2XL streamer hook, sizes #10-14
Thread:  UNI-thread 8/0 gray
Tail:  Gray marabou
Rib:  Small black UTC wire
Body:  Gray ice dub in a dubbing loop

Place your hook in your vise.


Start your thread.


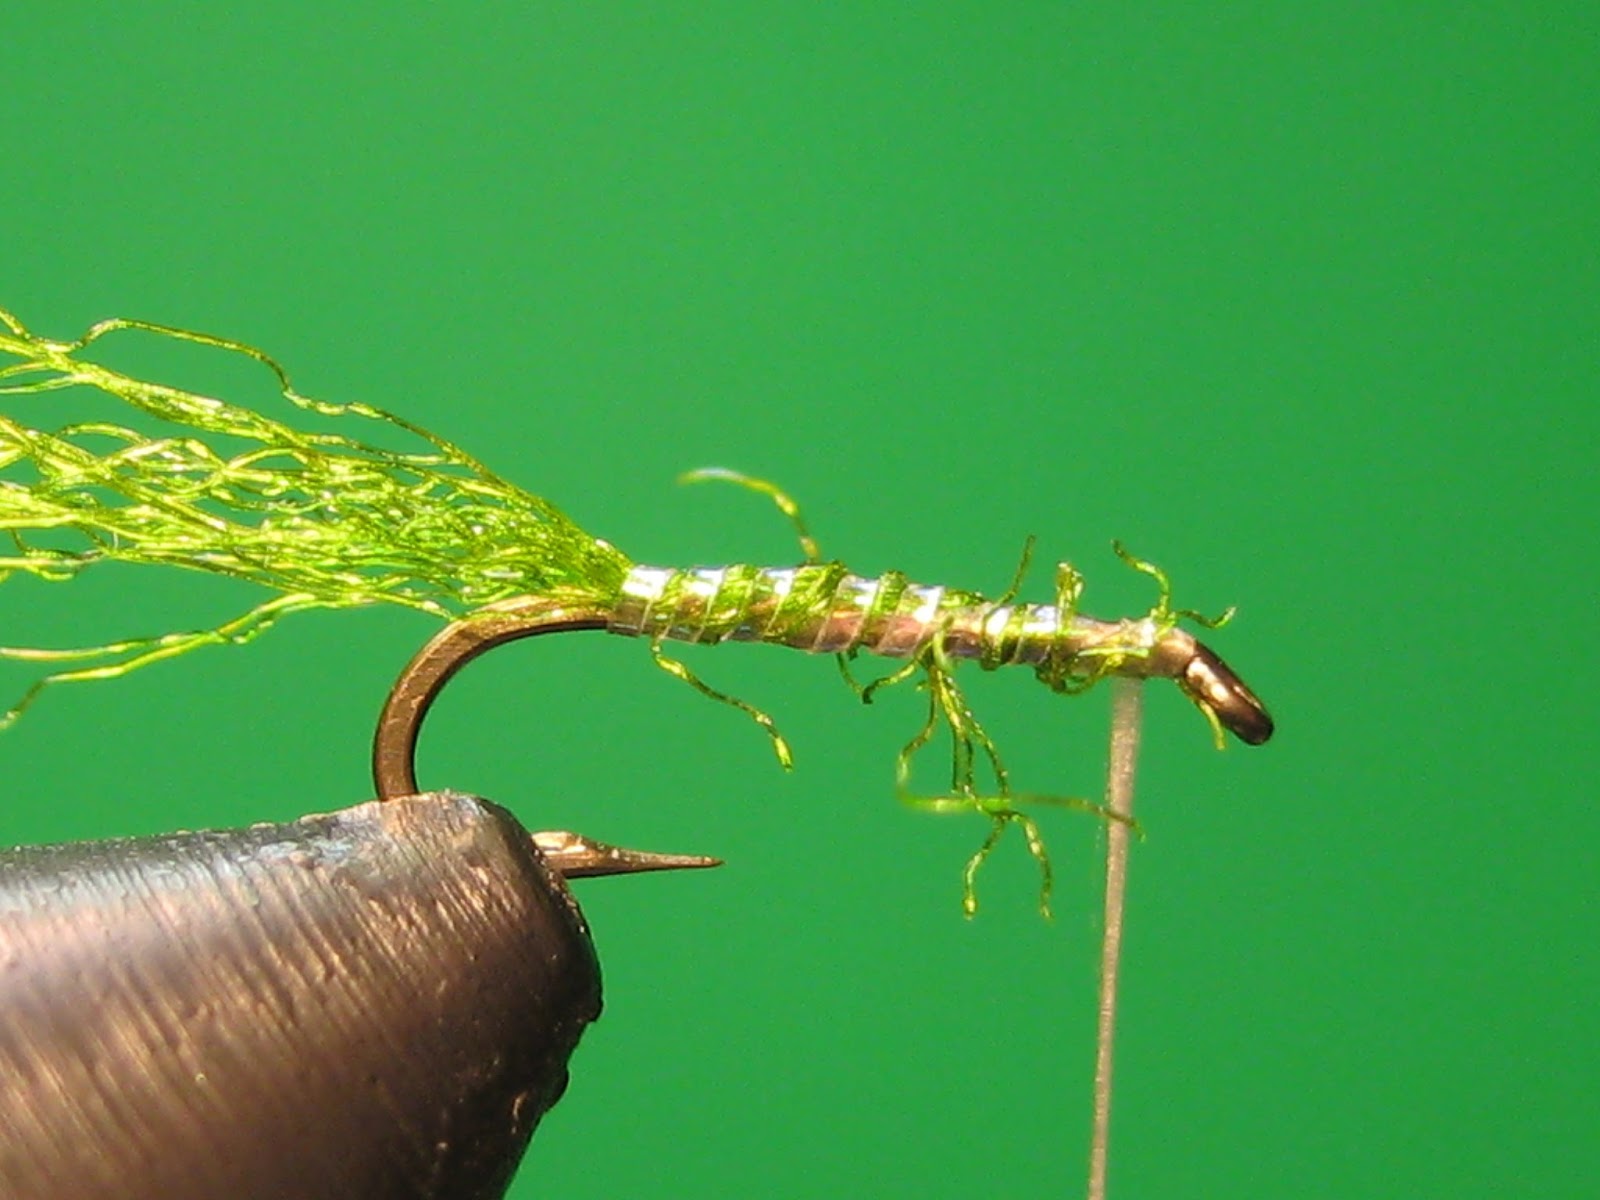
Tie in your tail.  The length should equal about the length of the hook shank.  Leave the butt ends long, they should extend almost to the hook eye.


Tie in your black wire rib.


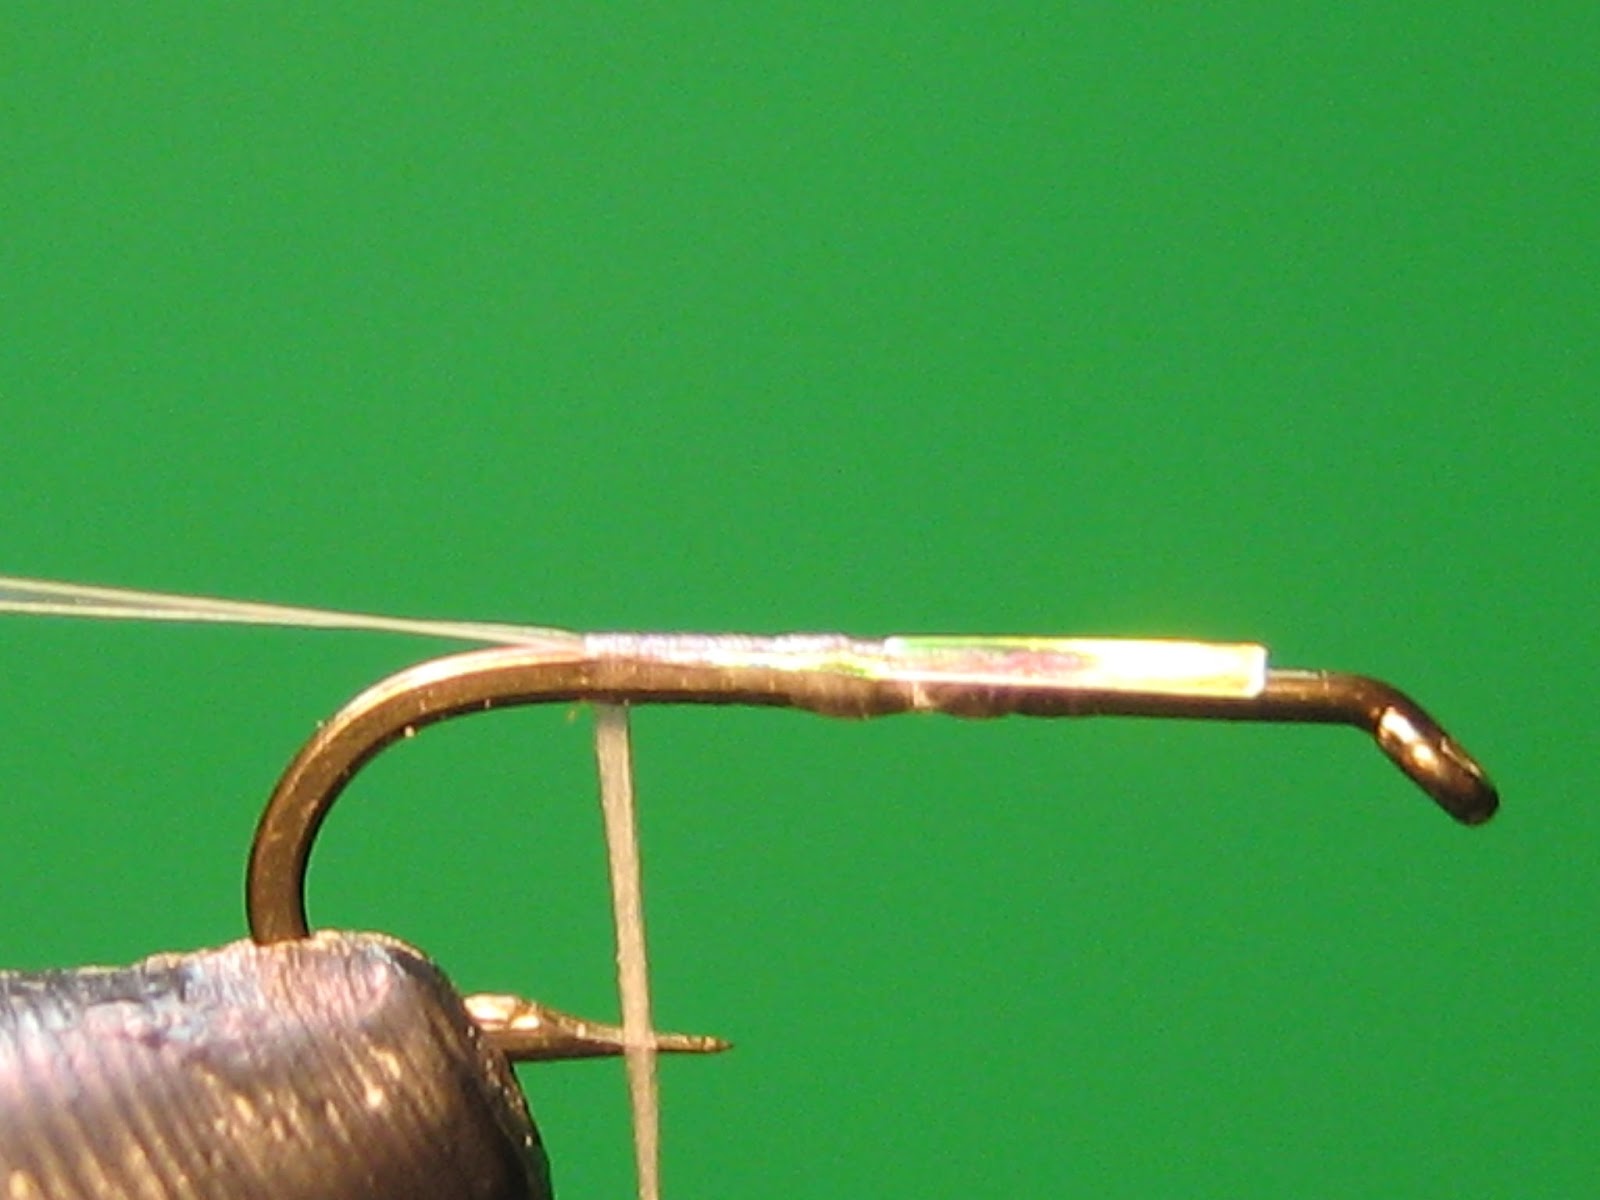
To make the body you can use a standard dubbing loop, or a split thread dubbing loop.  I will show you how I do a split thread dubbing loop.  It's pretty difficult to split 8/0 thread, but I've found a pretty cool method that makes it much easier.  First untwist your thread so it is laying somewhat flat, then rotate your vise slightly and lay your thread over the hook point as shown.  Then just split the thread with your bodkin.  It's much easier than trying to "catch" your thread as it's moving around.

After you split your thread, put something in the loop to keep the 2 parts separated.

This little scrap piece of foam works perfectly.


"Stack" some Gray UV ice dub by pulling the dubbing apart and placing back on top of the pile. Try to align the long fibers together.


Put some of your stacked dubbing into your loop. A little at a time works best.

I don't use dubbing wax here, but if it helps you by all means use wax.


Keep filling your loop with dubbing as evenly as possible until you have enough to build your entire body.  As you work your way down, remove the piece of foam that is holding your loop open.

If you are having trouble with keeping your dubbing in your loop, you can spin your bobbin just enough to hold the dubbing in place, while still keeping a loop open on the bottom to add more dubbing to.


Once you are happy with the amount of dubbing you have, twist your bobbin to lock the dubbing in place.


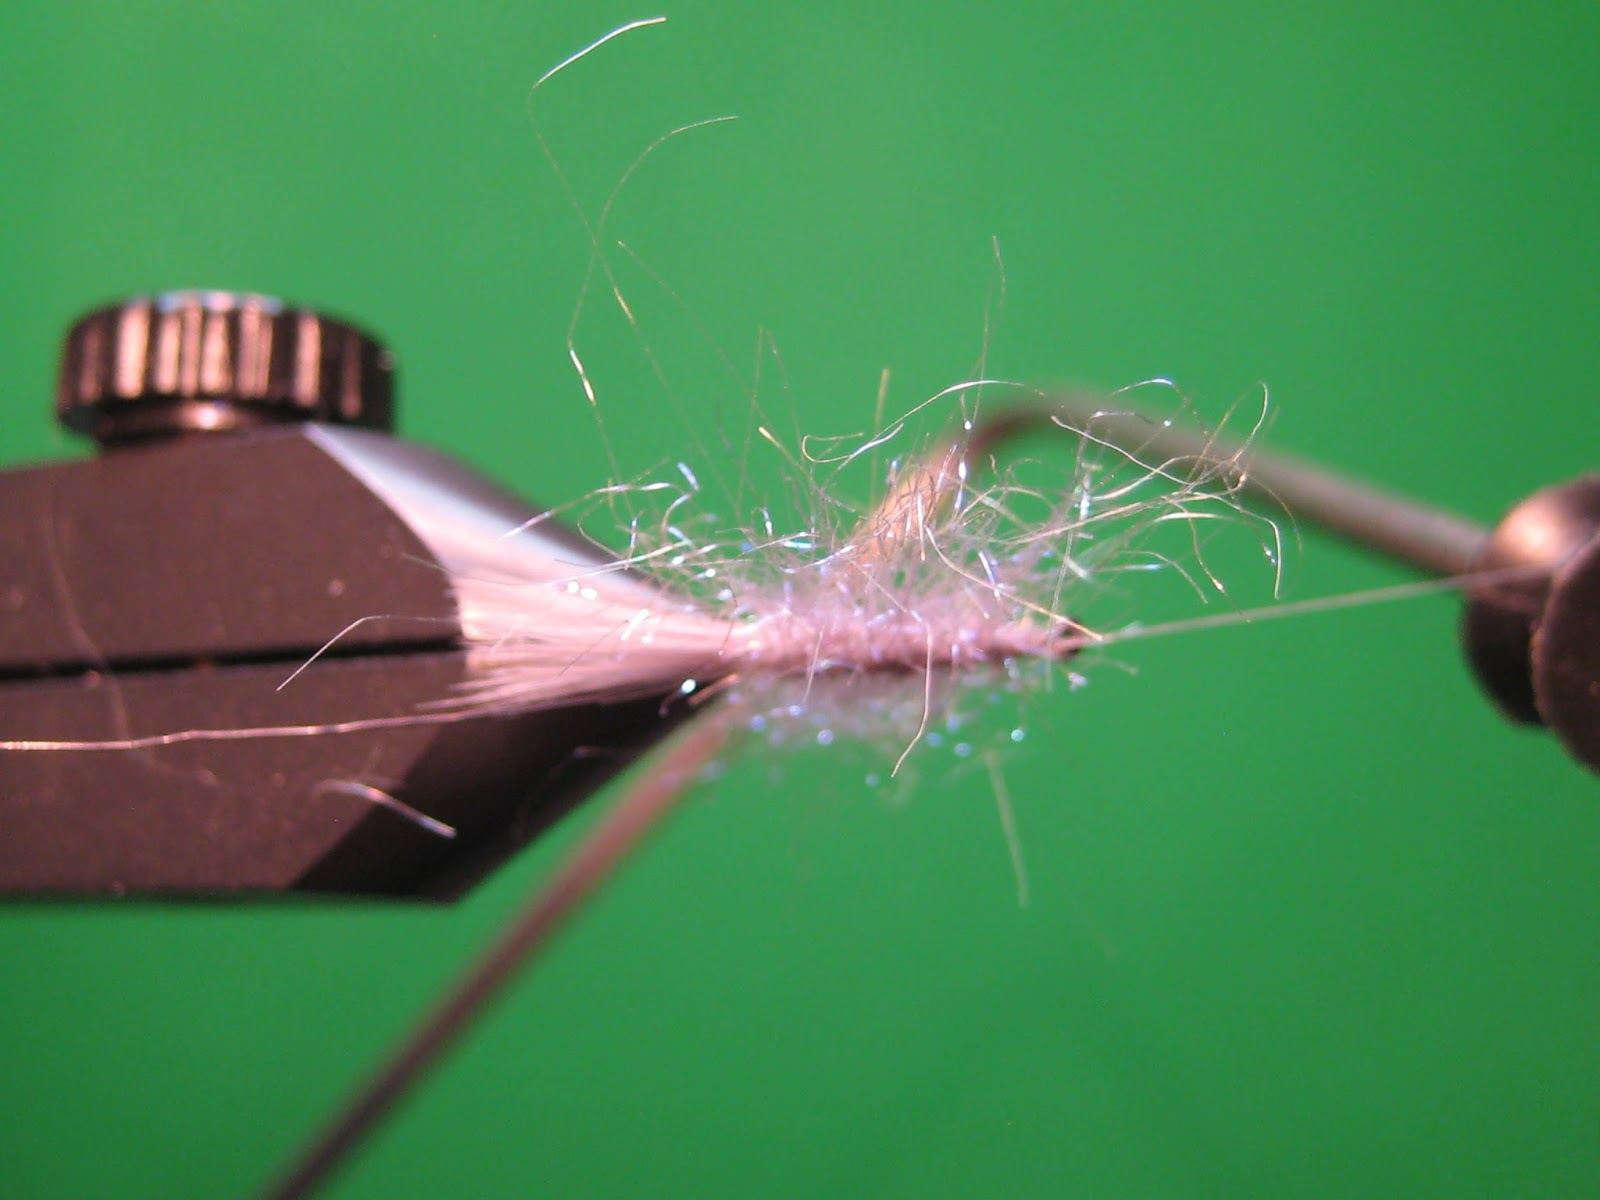
Use a brush or piece of velcro to tease out the dubbing fibers.


Start wrapping your body forward.  After each wrap pull the fibers back with your thumb and forefinger.


Build a slight taper towards the head.


Using a brush or piece of velcro tease out the dubbing fibers again.  I stand them straight up and down so when I wrap my rib I don't trap too many.


An old tooth brush makes an excellent dubbing brush tool.


Here are the dubbing fibers standing straight up and down.


Here's the view from the top.


Now, wrap your rib forward.  Try to trap as few dubbing fibers as possible.  Tie the rib off with your thread.

Whip finish, and apply head cement.


Using your dubbing brush tool, tease out the fibers one last time.  It also helps to use your bodkin to pick out the fibers trapped by the rib. Do not pull out too much though, and don't break the wire rib!


Here's the fly with all of the dubbing fibers teased out.


Get this thing wet, and you will have one of the best bait fish imitations I've ever seen.

Enjoy!


Friday, August 23, 2013

Opal X caddis


Materials needed:
Hook:  Standard dry fly hook sizes #14-18.  I'm using a Mustad 94840 size #18.
Thread:  UNI-thread 8/0 tan.  I am using a gel spun thread in white.
Tail/shuck:  Amber or tan Z-lon are the most popular.  Green has worked well for me.
Body:  Small pearl tinsel wrapped over the butt ends of the shuck.
Wing:  Deer or elk hair.

Place your hook in your vise.


Start your thread.


Tie in your tinsel.  Leave the butt end of the tinsel long.  It should come up just short of the hook eye.


Tie in your Z-lon with one wrap of thread.  Leave your butt ends of Z-lon as long you left the tinsel.


Lift the butt ends of Z-lon, and wrap your thread forward tightly securing the butt end of tinsel to the hook shank.


Press your thumb nail down on the thread wrap that is holding the Z-lon in place.  This will distribute the Z-lon around the hook shank somewhat evenly.


Wrap your tinsel forward with open wraps, securing the butt ends of Z-lon to the hook shank.

Every couple of wraps, pull the butt ends of the Z-lon forward towards the hook eye.


Tie off and trim the tinsel when you are about an eye's length away from the eye.


Trim any stray fibers.  You can also just leave them.  They make pretty good legs.

Trim the shuck/tail to about the length of the hook gap.


Cut, clean, and stack a bunch of deer or elk hair. The tips of the wing should be about the length of the hook shank.

I usually tie mine just short of the shuck, and slightly longer than the hook bend.

Tie in the deer hair with 2 loose wraps quickly tightened to flare the butt ends of the deer hair.  Don't let the wing rotate around the hook shank.

Wrap your thread through the butt ends to secure it to the hook shank.

Trim the butt ends of your wing leaving a tiny head.

Whip finish and apply head cement.