 |
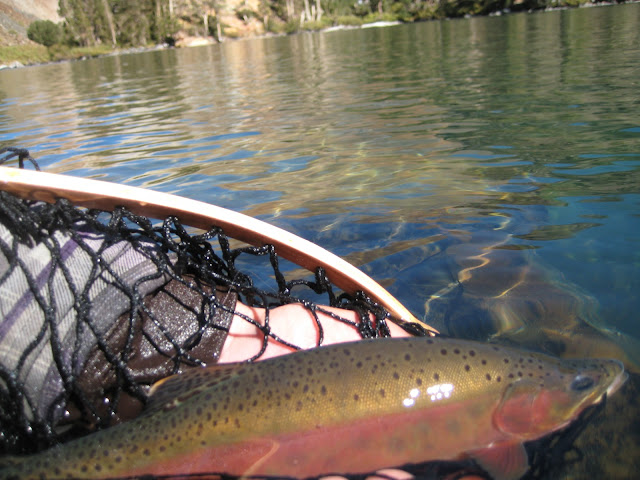
| One of the first fish caught early in the morning. |
This past weekend, a friend and I hiked up to an eastern sierra lake, looking to catch a few golden's. I was at the same lake about 5 weeks ago, and I caught a few, but the weather did not cooperate, and we had to leave early.
I rarely strip woolly buggers if I can help it, and I have about 2 in my fly box. So I made a trip to the fly shop and picked up some size 12 and 14 olive, black, and rust colored woolly buggers just in case we couldn't figure out what bugs they were eating.
 |
| The opposite bank the next morning. |
We found a little sand shelf that dropped off to what looked like a nice depth. There were some fish rising around us, but not enough to start guessing what invisible gnat they were sipping off the surface.
I started stripping an olive woolly bugger, with a size 20 pheasant tail behind it. After a fish-less hour, we decided to move to another part of the lake.
There are actually two lakes, with a cold runoff creek spilling into the first lake, then there is a small, half mile creek that connects the first lake to the second lake. We decided to stay on the fist lake, but move to the outlet.
We could see fish surfacing everywhere near the outlet. My buddy stuck with the woolly bugger, while I switched to a size 20 parachute adams. I couldn't even get them to look at my fly, so I switched to a size 22 gnat. Still nothing.
We ended up going back to the campsite that night fish-less.
The next morning, we headed back to the sand shelf with the sharp drop off. Stripping woolly buggers again, we caught three in about 4 hours.
We decided to move again, this time we would go around the other side of the lake, fishing every spot that looked good, making our way back to the outlet. We saw a few fish here and there, but couldn't seem to hook one.
We finally stumbled on a hole in about 6 feet of water, up against the bank, that was absolutely loaded with fish. They were actively feeding on something about 2 or 3 feet under the surface. Unfortunately, these fish were super spooky and we scattered them a few times before I moved.
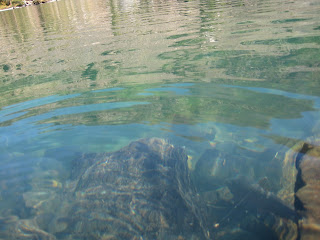
I found several spots up ahead with similar, shallow holes filled with fish. In the photo on the right, you can only make out a few fish because of the glare on the water. With polarized lenses, we were counting 20+ fish in this hole. It was still difficult getting a fly in front of these fish without scaring them. The overhanging bushes didn't help either...
I continued moving toward the outlet...

Finally, I found a spot where I could place my line in the deeper water, while keeping my fly in the shallows where the fish seemed to be feeding on something about a foot from the bottom.
Around this time, I also noticed some really small, (size 18-20) bugs cruising around in the sand and rocks at my feet. At first glance I thought these were little olive scuds, but after scooping one up, I discovered these were actually little olive baetis mayfly nymphs. Luckily, I always carry a variety of these nymphs in a multitude of different colors and sizes.
I settled on a favorite of mine, a Crystal Hunchback Baetis. It matched the color almost perfectly, and I had a few in size 20.
It was finally time to get rid of the woolly bugger! I tied on only one Crystal Hunchback Baetis, and decided not to use an indicator since the depth was only about 5 feet tops, and the water was so clear, I could see a fish following my fly from about 20 feet away.
 I started with a short cast towards the deeper water, then with a slight yank of the rod tip at the end of my forward cast, I put the fly in the shallows right in front of the fish without my line scaring them!
 Since I didn't have an indicator, I would need to retrieve my nymph with short, sharp, strips to keep the nymph where the fish were feeding, and to keep the nymph off the bottom.
Almost instantly, I had a fish notice my nymph. I watched him swim past it, then turn around, follow it for a second, and then I saw a mouth open, and bang! I got him!
I caught a few more using the same technique and fly. All of them were around 15 inches or so.
I figured it was time to find my friend and see how he was doing.
At first he thought I was kidding around that I'd landed a few fish, it was still slow going where he was. I told him about the Crystal Hunchback Baetis, and showed him the spot.
We ended up catching around 12 fish, in about 2 or 3 hours.
There is something special about stalking fish. Especially a fish like the Golden Trout. I also get a huge kick out of matching the hatch, and being extremely successful sight setting with that fly. I can't think of anything more fun.
The trip started out slow, but was totally worth stumbling on this hole full of fish at the end of our last day. We went from being pretty discouraged with the lack of fish caught, to yelling and high five-ing in a matter of minutes.
We will be back soon.
Here are a few videos from the trip. Enjoy!
Casting over some bushes, trying not to scare fish! One of the first holes we found.
The end of a good fight from this fish. They look amazing under the water.
The stacked hole we found. Casting across this little bay, retrieving our nymphs, and sight setting fish worked best.


