Thursday, November 1, 2012

How to tie the San Juan Worm

San Juan Worm

Materials Needed:
Hook:TMC 2487 sizes # 14-18
Thread:Red 6/0
Body:Extra fine, red chenille

This is a very simple pattern that does pretty well in muddy water. I don't use this pattern as often as I should... This is actually my very first attempt at tying it as well.


STEP 1:
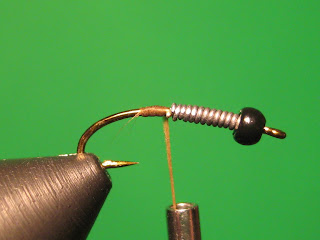
Start your thread, and wrap it to about the middle of the hook gap.


STEP 2:
Tie in your piece of chenille with a few tight wraps. Continue wrapping your thread forward around just the hook shank.


STEP 3:
When you reach the middle of the hook shank, lay your chenille down, and wrap a few tight wraps over it. Lift the chenille, and continue wrapping your thread around the hook shank.


STEP 4:
When you reach the eye of the hook with your thread, lay the chenille down and tie it in. Whip finish.


STEP 5:
With a lighter, burn the ends to length.

Sunday, October 28, 2012

How to tie the black bead birds nest.


Materials Needed:
Hook: 200R sizes #14-18
Bead: Black tungsten or black brass.
Thread: Olive 6/0.
Weight: Lead wire. (optional)
Tail: Mallard flank dyed yellow.
Rib: Copper wire.
Body: Arizona synthetics peacock, golden.
Thorax: Arizona synthetics peacock, golden.
Wings: Mallard flank dyed yellow.


STEP 1:
Place your bead on the hook. With these 200R style hooks, it may be necessary to bend the hook gap out just slightly to get the bead over it. If you bend the hook too much, it will weaken the hook drastically.

STEP 2:
Optionally, you can add lead weight to the fly. I always do since I am often using this fly to dredge deep bends.

STEP 3:
Start your thread just behind the lead wraps, or about at the hook bend.

STEP 4:
Wrap your thread parallel to the hook shank (perpendicular to the lead wraps) to "lock" the lead wraps in place.

STEP 5:
Wrap your thread parallel to the hook shank (perpendicular to the lead wraps)back toward the hook bend. Once you reach the end of the lead wraps, wrap a few tight wraps around the hook shank.

STEP 6:
Once you have wrapped your thread parallel to the hook shank to lock the lead wraps in, you can now wrap your thread parallel with the lead wraps without the lead wraps separating.

STEP 7:
Measure your tail. It should be at least 2/3rd's the length of the hook shank.

I leave the fibers attached to the feather. This way, It is much easier to keep the tips aligned if you mess up.

STEP 8:
Tie in your tail. You can pull the tail to length if you need to.

STEP 9:
Cut the fibers from the feather, and tie the tag ends in securely to the top of the hook shank.

STEP 10:
Tie in your copper wire rib.


STEP 11:
Dub your thread, and start wrapping a tapered body.

I always do one wrap of dubbed thread behind the rib, and then continue wrapping forward.

STEP 12:
Finish dubbing your body to where you will start your thorax.

STEP 13:
Wrap your rib, and tie it off.


STEP 14:
Tie in your legs on one side, and pull them to length.

STEP 15:
Tie legs in on the other side.


STEP 16:
Dub your thread to build the thorax.

STEP 17:
Dub your thorax slightly larger than the body.

Wednesday, October 24, 2012

How to tie the WD-40 emerger.


This is a very popular pattern in the western United States.  It was originally tied to imitate an emerging midge, but has proved effective as a BWO emerger as well.  I often fish this fly as a dropper off a dry fly or a nymph.

Material needed:
Hook:  Any standard emerger hook (I am using a TMC 2487) size #16-24
Thread:  Olive UTC 8/0
Tail:  Mallard flank dyed yellow to look like wood duck.
Thorax:  fine olive dubbing.
Wingcase:  Mallard flank dyed yellow.

Start your thread about halfway down the shank.


Select some fibers off your mallard flank.

I keep the fibers on the feather until I have them secured to the hook shank.  I do this so if I mess up, I can just re-even the fibers and start over without wasting materials.


Secure the fibers to the hook, and cut the fibers from the steam of the feather close to the stem.


Wrap your thread forward, keeping the mallard flank fibers on the top of the hook shank.

Be sure to leave enough room behind the eye of the hook.


Fold your mallard flank back over the hook shank and tie it down.


Dub some fine olive dubbing onto your thread.  Use a dubbing slightly darker than your thread if possible.


Build up a thorax with your dubbed thread.


Fold your mallard flank wing case over the thorax and tie it down.


Whip finish, and apply head cement.

Friday, October 19, 2012

Japanese nymph leg substitute for realistic legs.


I have found a perfect substitute for the rare "Japanese nymph legs"...

I cut out the flat part from the lid of a coffee can lid.


With the flat part cut out, I took a razor blade and cut strips from it, as thin as I could.


...Leaving you with these.

From here, you can use them just like regular JNL's.

To make them thinner than you can cut, try heating the strip of plastic evenly and quickly, and let it hang, and stretch out.  This will give you some really nice looking legs.

I tie these in with a figure eight thread wrap.  To make the joint's, heat up your bodkin (not too hot), and press it against the leg.  When you are finished, color them with a black Sharpie.


Method 2:
The above method works great for larger patterns.  For smaller patterns, I have been experimenting with a few different materials.  Broom bristles work great.  They lay down perfectly, and they look good too.

I have also tried using paintbrush bristles which are smaller and look great, but they are pretty difficult to work with.  While bending the joints, I melted off a few legs entirely.  It will take some practice for sure.

I will be posting at least one step by step pattern involving these legs in the next few days to show how to make the joints, and tie in the legs.