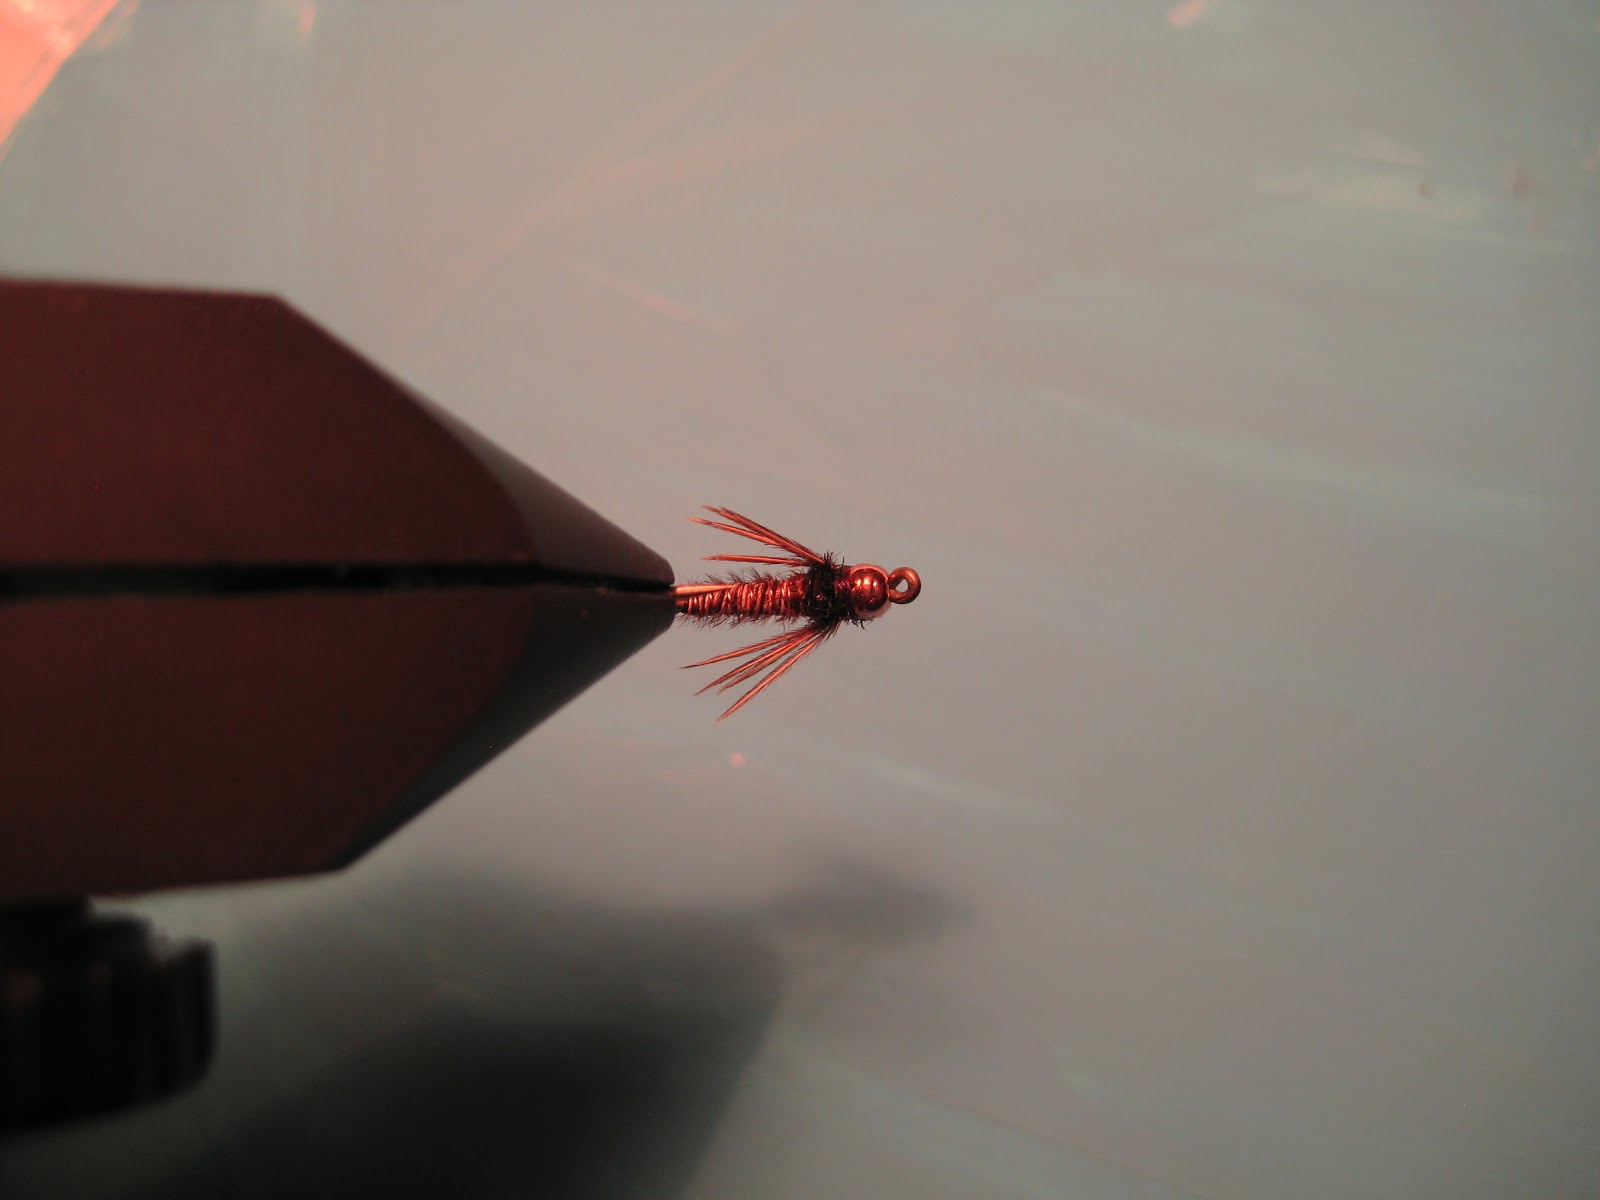
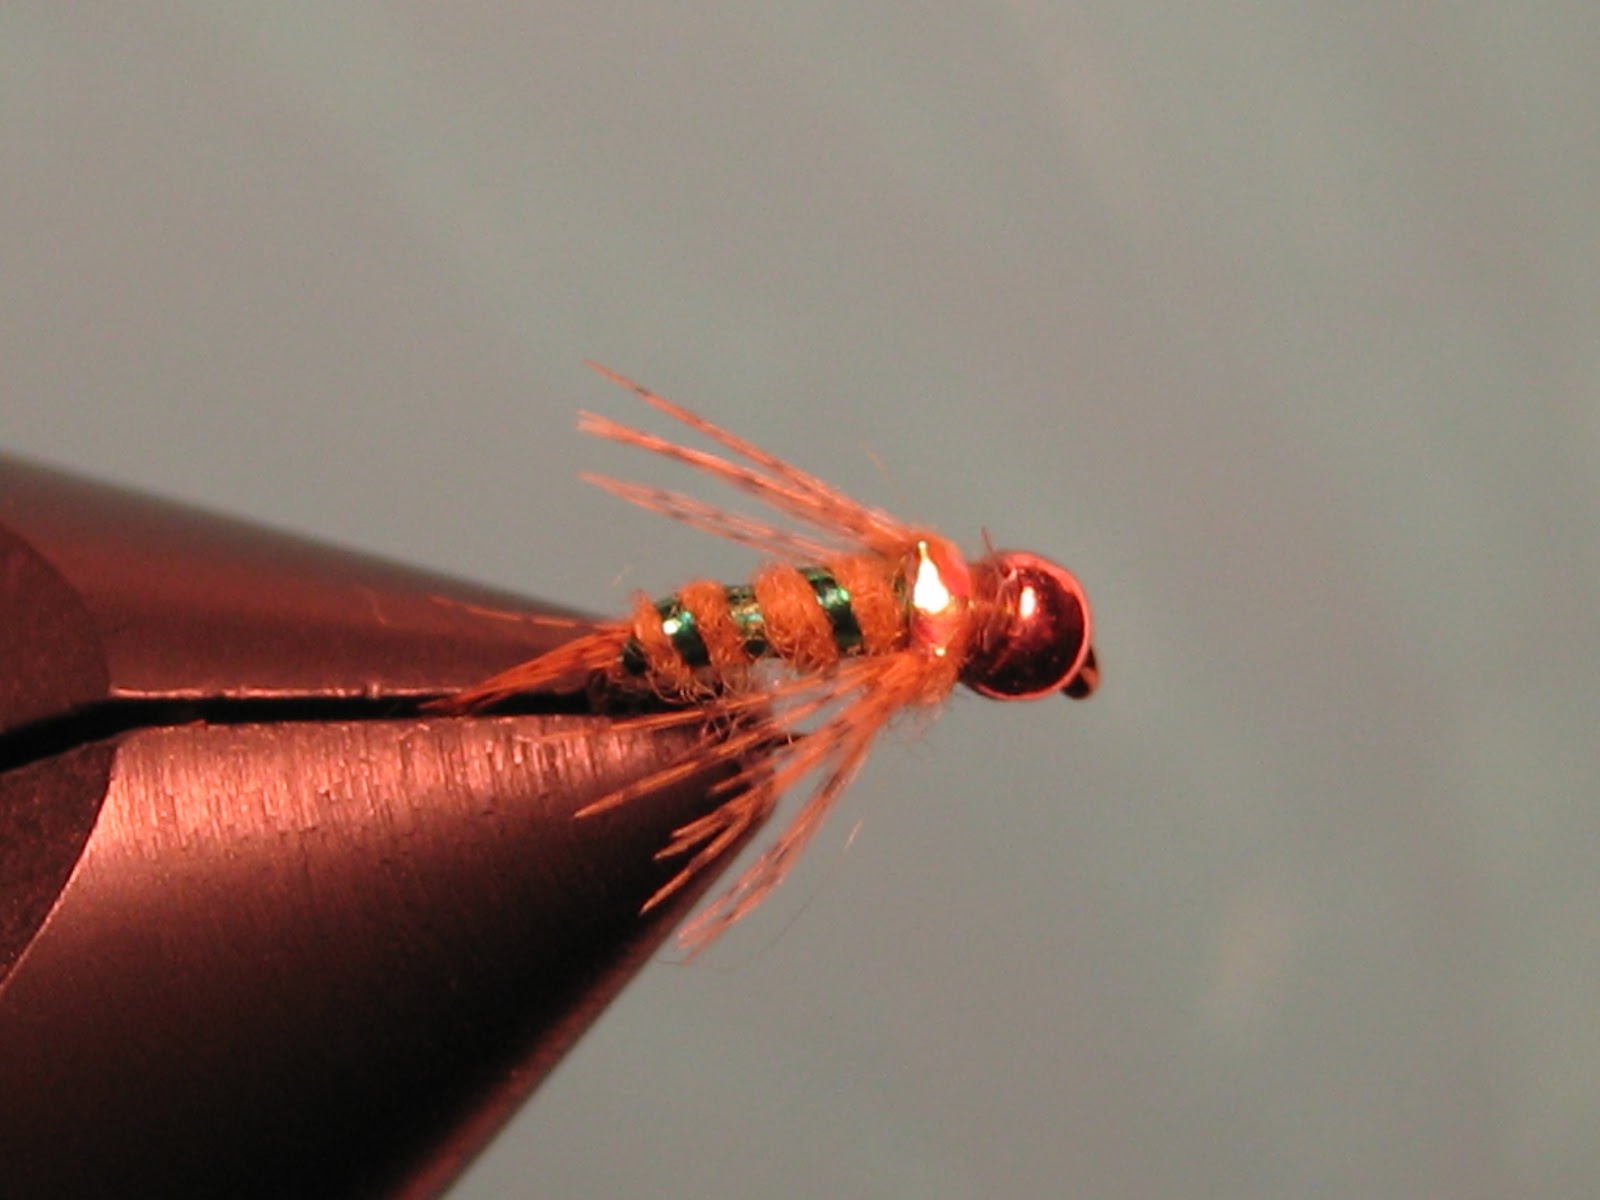
Flashback Beadhead Pheasant Tail Nymph

This is another killer pattern that I have had great luck with. I use it when fish are eating darker mayfly nymphs in rivers, or during a callibaetis hatch. I have also read about fish taking this pattern as a midge. This is a go to pattern for me, and there is no better combination to search for fish than a Gold Ribbed Hare's Ear, and some variation of a Pheasant Tail Nymph dead drifted through a deep bend.
Hook: Standard nymph hook #12-22.
Thread: Dark brown UTC 8/0.
Bead: Tungsten, or brass, copper color, one size smaller than you would normally use.
Weight: Several wraps of lead wire behind the bead.
Tail: Pheasant tail fibers.
Rib: Small copper wire (wrapped counter-clockwise).
Body: Several pheasant tail fibers wrapped (wrapped clockwise).
Flashback: Large pearl tinsel.
Thorax: Peacock herl.
Legs: Pheasant tail fibers.

I use a smaller bead to leave enough room for a thorax behind the bead. I think it looks better to have the bead match up perfectly to the thorax as well.


If you wrap your thread normally over the lead wire, it will separate the wraps, and leave you with a mess. To remedy this, I always wrap my thread across the lead wraps a few times to keep them together, then you will be able to tightly wrap your thread normally to cover all the lead.
Make sure your lead wraps are tightly secured to your hook shank.


Wrap the tail fibers forward clockwise around the hook shank.
For the body, I use a technique called counter wrapping. Counter wrapping is wrapping one body material one way, and the rib material the other way. It is used to strengthen fragile body materials, like quill bodies, and fiber bodies. Wrap your pheasant tail fibers either clockwise, or counter-clockwise, just make sure you wrap your rib the opposite way.

Wrap your rib counter-clockwise around the hook shank. Tightly tie in your rib wire, and break the wire by bending it back and forth near the tie in point.


Again, you cut the tips of the peacock herl off because it's weak, and it will probably break when you're wrapping your thorax.

 Tie off your peacock herl, and cut off the tag end.
 Tie in six or so pheasant tail fibers on one side of the thorax with two soft wraps.
 You can tie the tail fibers in long, with 2 soft wraps.
 Pull the pheasant tail fibers to length, about the length of the hook shank.
 Keep the fibers on the side of the thorax. Use your other hand to keep the fibers from shifting. You may have to re-tighten your thread wraps.

Once the fibers are pulled to length, cut the tag ends, and tie them off with a few tight wraps.
 Tie in 6 legs on the other side of the thorax using the same technique.

 Whip finish, and apply head cement.
I ended up plucking out some of those fibers making up the tail of the nymph. It looked a little thick to me.